
As part of our Summer Meet the Team Series, we’ve all been sharing some of our favorite summer products on Instagram, flatlay style. Wondering what a flaylay is and how to create your own? We've decided to create a handy little guide full of tips and tricks to help you get the most Instagramable picture possible.


What’s a flatlay?
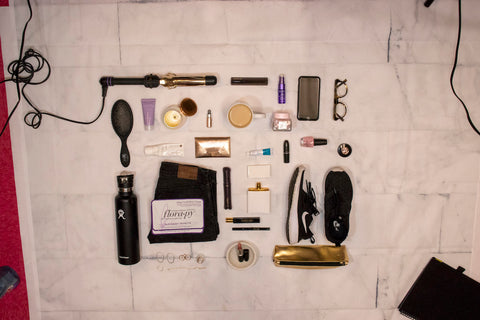
A flatlay is a new term for a still-life or lifestyle photograph of objects arranged in a visually pleasing way, shot from above. Flatlays are a great way to showcase just about anything, from your favorite beauty products, to outfit of the day, to your desk items at the office.
Step 1: Style Brainstorming
Get inspired! Check out what other people are doing! Find images you’re attracted to and note the details that stand out to you. What’s in the background is it flat color or a textured nature shot? The easiest option is to start looking around your house, you can use surfaces you already have. Some ideas would be a trunk or coffee table that has a unique texture like; granite, marble, concrete countertops or serving trays and cutting boards. You could also use a blanket, a rug, or a furry fabric.
For example, Florapy is a natural skincare product so we like to use flowers to accessorize our backgrounds because all of our Florapy formulas are infused with healing flowers and aromatherapy.
Step 2: Location:
Start by selecting a location for your photo shoot. Don’t forget to consider your lighting source. The best lighting is outside on an overcast day, you’ll get great natural lighting without it being too bright. The next best option would be in a room that gets plenty of natural light near a window.

Step 3: Organizing your shot
Start with your background and begin to build it up. Gather some of your favorite products.

Pull together a collection of items you want to feature. Notice a trend in colors or styles? The better the products look together, the greater your overall composition will be. If the products you’re trying to feature don’t look like they belong together, try adding accessories to help the image look cohesive. The best way to create a relatable image is to source from props you already have!

Step 4: Take those pictures
Once you’re happy with your arrangement, start taking photos! After you take some pictures, take some time to look at the images a little closer. When you are reviewing your photos, try to notice the lighting, shadows and product arrangement.

After reviewing, try rearranging some items. Take photos from different angles. Then, review again. You can repeat this process as many times as you’d like.

Step 5: Review and Edit
Now’s the fun part—seeing how all your images turned out! Upload your pictures to your computer or work right from your phone. Pick out your favorite images and start editing. If you don’t have Photoshop don’t worry, there are a ton of photo editing apps out there.
BEFORE:
AFTER:

Once you’ve got your flatlay looking amazing, it’s time to share it with the world. When sharing, make sure to mention some of the reasons you’ve chosen these products – let the social media world get a little glimpse into your personality and your daily lifestyle.
Here at Florapy, we love to get to know our followers and we want to see what matters to you! What products are you digging right now? What does a day in your life look like? After reading please tag @florapybeauty and #florapyfan in your own flatlay images to participate in our Summer Contest!!!